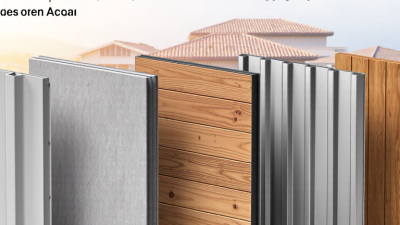

Vertical siding gives a home a taller, more defined appearance, but the finished look depends on careful preparation. Straight boards can make small framing irregularities easy to spot. Water management matters just as much as neat lines. A clean installation begins with a sound wall, suitable flashing, and the correct materials for the building.
Home-renovation contractor Mike Holmes is known for the simple standard, “Make it right.” That principle fits vertical siding: follow the product manufacturer’s instructions, check local requirements, and do not hide problems behind new panels. Start by inspecting the sheathing and planning where seams, corners, and openings will fall. Then install the required weather-resistive barrier, flashing, furring, and trim for the chosen siding system. Details vary. Vinyl, fiber cement, and wood each have different fastening and clearance rules.
This guide explains the tools, layout, fastening, and finishing steps involved in installing vertical siding. It also highlights common mistakes, such as skipping drainage space or forcing panels tight against trim. A level and a chalk line help, but they cannot correct a crooked wall. That part takes judgment. Even careful installers may need to adjust their layout when the building is out of square; the important thing is to notice early and follow the product guidance rather than improvise blindly. Proper installation takes patience, and a little humility helps.
Before choosing vertical siding, inspect the wall from the eaves to the foundation. Look for bulged sheathing, soft spots, peeling paint, and dark staining around windows. Press a straightedge across several areas; ridges can telegraph through tall boards. Check that the framing and sheathing are sound, and trace any signs of leaks before covering them. The USDA Forest Products Laboratory’s Wood Handbook places wood’s fiber-saturation point near 30% moisture content. Readings approaching that level deserve investigation, not a quick cover-up. One meter reading is not the whole story. Check several locations, especially near openings and the lower wall.
Next, match the siding profile and material to the wall’s exposure, drainage, and support. APA’s Engineered Wood Construction Guide discusses the need for properly supported, suitable sheathing beneath exterior finishes; confirm that the existing substrate meets the chosen siding system’s requirements. In rainy or windy locations, assess flashing, the water-resistive barrier, and drainage paths before installation. Vertical boards can make uneven walls more noticeable, so note dips and high points in raking light. That check can feel slow. It is still useful. Compare material weight, maintenance needs, and the manufacturer’s published exposure and fastening guidance. I would not choose a profile by appearance alone; the wall’s condition may change the answer.
Before installing vertical siding, lay out the tools and materials where you can reach them without crossing the work area. Gather a tape measure, level, chalk line, square, utility knife, hammer, and suitable saw. Keep spare blades nearby; dull blades can make cuts rough and harder to control. Measure twice. Set aside the siding, trim pieces, flashing, and fasteners specified for your wall system. Check that the quantities cover corners, openings, and a few cutting mistakes. That buffer matters. I still find it easy to underestimate trim, especially around windows.
Wear safety glasses, work gloves, hearing protection, and a dust mask suited to the material being cut. Use a stable ladder or approved work platform, and keep both feet secure while handling panels. Before cutting, check the area for hidden wiring or pipes, and move cords away from the blade path. A helper can steady long panels and pass tools, but agree on signals before lifting. Check the weather, too; wind can turn a broad panel into an awkward sail. It is tempting to skip a quick equipment check when the wall looks ready. Don’t. A cracked ladder foot or loose saw guard deserves attention before work begins.
| Category | Tool or Material | Typical Use or Quantity Guide | Preparation and Safety Notes |
|---|---|---|---|
| Tools | |||
| Measuring and layout | Tape measure, level, chalk line, and pencil | Use to measure the wall, mark reference lines, and check that panels are plumb. | Plan panel layout before cutting; account for corners, openings, and trim. |
| Cutting | Circular saw or siding shears | Choose a cutting method appropriate for the siding material and its installation instructions. | Use the correct blade or tool; control dust and wear eye and hearing protection. |
| Fastening | Hammer or siding nailer | Use compatible corrosion-resistant fasteners of the length specified for the siding and wall assembly. | Follow the product instructions for fastener spacing and placement; avoid overdriving nails. |
| Access | Ladder or properly assembled scaffold | Select equipment rated for the worker, tools, and materials being carried. | Set on firm, level ground and maintain safe access; do not overreach. |
| General work | Utility knife, snips, and pry bar | Useful for trimming compatible materials and carefully removing or adjusting existing pieces. | Keep blades sharp and directed away from the body; use tools only for their intended purpose. |
| Materials | |||
| Siding | Vertical siding panels or boards | Measure the net wall area and allow for cuts and waste; follow the product’s coverage information. | Confirm the siding is suitable for the building and climate, and store it flat and dry as directed. |
| Weather protection | Code-compliant weather-resistive barrier and compatible flashing | Use where required by local code and the wall design; flashing is needed at relevant openings and transitions. | Lap, seal, and integrate materials to direct water outward, following their installation instructions. |
| Wall support | Furring strips or backing, if required by the siding system | Install only where specified to provide the required fastening base, drainage space, or ventilation. | Check the wall is sound and the layout provides adequate support at panel edges and joints. |
| Fasteners | Corrosion-resistant nails or screws | Quantity and size depend on the siding system, framing, and specified fastening schedule. | Use fasteners compatible with the siding material and exposure conditions. |
| Finishing | Starter pieces, corner trim, J-channel, and other specified trim | Determine lengths by measuring the wall perimeter, corners, openings, and panel edges. | Use components approved for the siding system; allow for movement where the instructions require it. |
| Safety Equipment | |||
| Eye protection | Safety glasses or goggles | Wear during cutting, fastening, and overhead work. | Choose protection appropriate to the cutting tool and material. |
| Hearing protection | Earplugs or earmuffs | Use when operating power saws, nailers, or other loud equipment. | Follow the equipment instructions and applicable workplace safety guidance. |
| Respiratory protection | Suitable dust mask or respirator | Use when cutting materials that generate dust, as required by the material and task. | Use the correct type and fit; follow material safety information and local requirements. |
| Hand protection | Work gloves | Wear when handling panels, trim, and sharp-edged materials. | Choose gloves that provide a secure grip and do not interfere with tool operation. |
| Fall prevention | Appropriate fall-protection equipment, when required | Use for elevated work when required by the height, site conditions, or local safety rules. | Inspect equipment and use it with a suitable anchorage and training. |
Before installing vertical siding, inspect the wall for soft sheathing, loose nails, and bulges. Replace damaged sections and fasten any loose panels. The surface should be firm and reasonably flat; siding will not hide a wavy wall. It is easy to rush this part. Check corners, window trim, and door frames for gaps or old sealant that has pulled away. Follow the siding instructions for required clearances and flashing details.
Install a suitable weather-resistive barrier over the prepared wall, following local code and the barrier’s instructions. Start low and overlap each higher sheet over the one below, like shingles, so water drains outward. Keep the material smooth, not stretched tight, and secure it with the specified fasteners. Tape seams only with a compatible tape. At windows and doors, integrate the barrier with flashing so water is directed out, not behind the wall covering. Small wrinkles can seem harmless. They may complicate later flashing, so flatten them before moving on. Check penetrations and corners carefully; these details are easy to miss when the wall looks finished.
Fit Starter Strips, Flashing, and Vertical Siding Panels
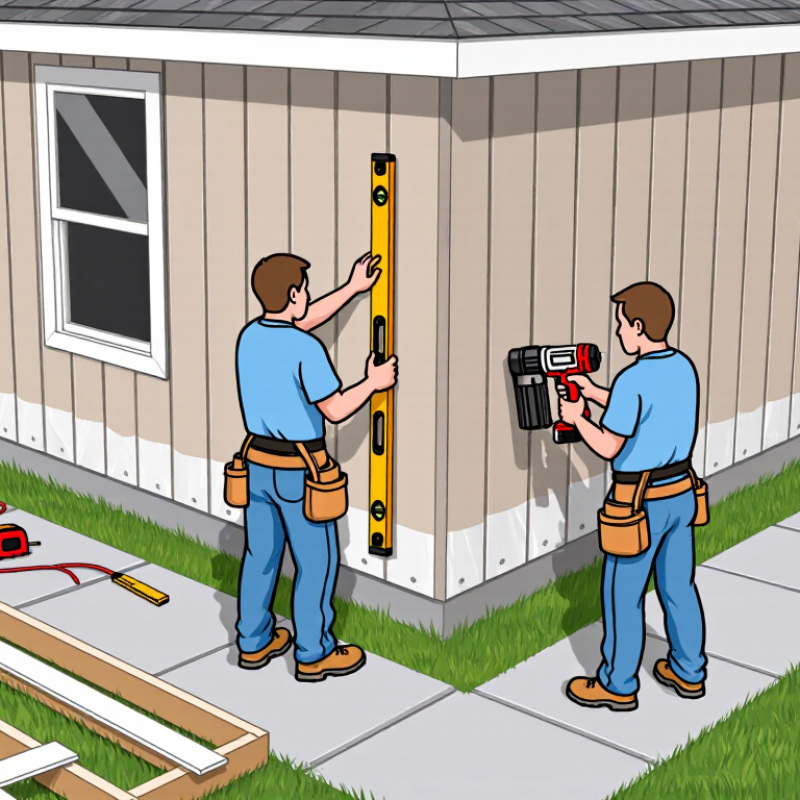
Begin with a straight, level starter strip suited to the vertical siding system. A slight slope at the base can make every panel look crooked. Check the wall for flatness, then mark a plumb line at a corner. Fit the water-resistive barrier and integrate flashing at windows, doors, and other openings. Lap upper flashing over lower layers so water drains outward, not behind the cladding. The U.S. Department of Energy’s Building America guidance emphasizes continuous drainage and properly integrated flashing; a neat-looking joint alone is not enough.
Set each panel into its starter and corner channels without forcing it tight. Vinyl siding expands and contracts, so leave the clearances specified by its installation instructions. The Vinyl Siding Institute’s Vinyl Siding Installation Manual advises leaving about 1/32 inch beneath nail heads, allowing panels to move freely. Center fasteners in the slots, and follow the panel maker’s spacing requirements; vertical panels commonly need closer fastening than horizontal siding. Check plumb every few panels. It is easy to miss a small drift until the last panel refuses to fit. Rechecking takes time, but correcting a bowed run later takes longer.
Follow the steps in order: prepare the wall, install the water-resistive barrier, fit flashing, attach starter strips, then install the vertical panels. Details can vary by siding system, so follow its installation instructions.
At corners, windows, and doors, fit trim straight and snug without crushing the siding. Cut edges should be clean, with no splintered corners or bent panels. Leave the clearances specified for the siding material; tight-fitting trim can restrict movement as temperatures change. Take your time. A small gap is easier to correct now than after caulking.
Seal only joints that are intended to be sealed. Use an exterior sealant compatible with the siding and trim, and apply a steady bead where the installation instructions call for it. Tool the bead so it contacts both surfaces, but avoid filling drainage paths or weep openings. More sealant is not always better. It can trap water behind the panels.
Inspect the wall from several angles in daylight. Check that trim lines are even, joints are closed where required, and fasteners sit correctly without dimpling the siding. Look closely at panel ends, corners, and openings, where small gaps often hide. Press gently around suspicious areas and watch for movement. If a seam looks uneven, pause before adding sealant; the underlying trim or panel may need adjustment. A final check can feel repetitive, but it catches details that are easy to overlook.