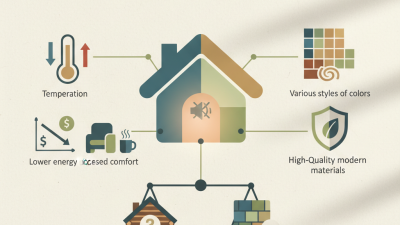

Choosing a home with vinyl siding involves more than liking its color from the curb. The panels should look even, with no loose edges, cracks, or obvious waves. Check corners, window trim, and the ground-level courses, where damage and poor water management can be easier to spot. Small details matter.
This guide shares ten practical tips for buyers comparing homes or planning a siding project. It covers panel thickness and profile, color consistency, installation quality, warranties, maintenance, and questions to ask contractors. Vinyl siding can be a low-maintenance exterior, but it is not a substitute for sound flashing or proper water management. A fresh-looking surface may conceal concerns underneath, so a visual check alone cannot confirm the condition of the wall.
Look closely. Note any stains, soft-looking trim, or gaps around openings, and ask when the siding was installed. Request product and warranty documents rather than relying on a verbal promise. If you find damage or suspect moisture, consider an independent inspection before making a decision. That may add time and cost. Still, it can help clarify what needs attention and what is simply cosmetic. No single tip guarantees a trouble-free purchase; careful questions and a qualified professional can make the choice more informed.

Vinyl siding works best when it suits the house beneath it. Walk around your home and note peeling paint, damp corners, loose trim, or rooms that feel drafty. These signs may point to repairs beyond the siding itself. A new exterior can hide trouble, but it cannot fix trapped moisture. Start at the walls. Check the roof edges, window frames, and foundation before comparing colors or profiles.
Tips: Match the siding profile to your home’s scale and architectural details. In a sunny area, ask how color and finish handle long-term UV exposure. For coastal wind, heavy rain, or freeze-thaw cycles, check local installation guidance and fastening requirements. Small details matter.
Climate should shape your decision, but no siding choice replaces sound installation. Ask a qualified local contractor how the product handles your area’s wind, heat, and moisture, and request details about flashing and ventilation. Compare maintenance needs, too: light-colored panels may show less fading, while textured surfaces can collect dust. I used to focus mainly on appearance; that was too narrow. Bring home samples and view them beside your trim in morning and afternoon light. Your favorite shade may look different on a cloudy day.
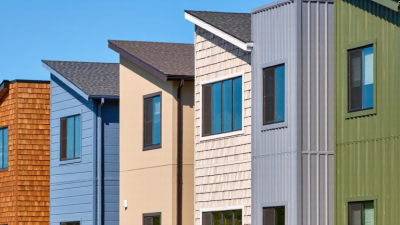
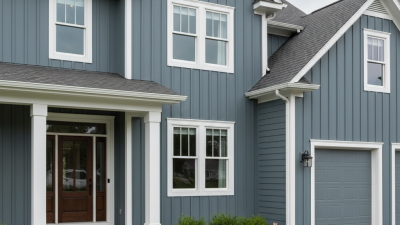
Vinyl siding profiles change a home’s shadow lines as much as its color. Traditional clapboards create narrow, familiar bands; Dutch lap adds a deeper groove; board-and-batten makes vertical walls feel taller. Shingle-style panels add texture around gables, but can look busy across a large facade. Hold samples against the house, not just inside a showroom. Check them in morning shade and afternoon sun. Small differences matter.
Color shifts with light, nearby brick, and roof tone. Compare full-size samples, and view them from the street. Standard and insulated vinyl options also differ: insulated panels add backing, while standard panels may suit tighter budgets. Ask for product specifications on thickness, wind resistance, and color warranties; performance varies by product and installation. A useful financial reference is the 2024 Cost vs. Value report from Zonda and Remodeling: vinyl siding replacement averaged $17,410 nationally, with an estimated $15,485 resale value, or 88.9% cost recouped. Those figures are averages, not promises. I would not choose a profile from resale numbers alone. A sample can still fool you.
Vinyl siding is commonly specified in thousandths of an inch, or mils. The values shown are examples of nominal panel thickness specifications buyers may encounter, not a universal grading scale. Compare the product’s full specifications—including profile, installation requirements, and warranty—rather than choosing by thickness alone.
Vinyl siding should feel consistent from panel to panel, with no obvious ripples, cracks, or brittle edges. Inspect a sample in daylight, not just under showroom lights. Look at the cut edge and the locking channel; uneven thickness or a loose fit can signal poor quality. Ask for published impact and wind-performance information, and check whether it applies to the exact panel profile you are considering.
A heavier panel may feel reassuring, but thickness alone does not guarantee durability. Installation quality matters just as much.
Think about the wall’s exposure. Darker colors can absorb more heat, while strong sun may gradually fade some finishes. Ask how the product handles local temperature swings and what warranty exclusions apply. Read the fine print.
For upkeep, most siding needs occasional washing with mild soap and a soft brush, but follow the care instructions for your chosen product. Avoid assuming a pressure washer is harmless. Check seams, corners, and areas around windows each year for gaps or loose trim.
Water can get behind siding when flashing is poorly fitted. That detail is easy to miss. I might overfocus on the panels themselves; the supporting installation deserves equal scrutiny.
Set a firm spending range before requesting estimates, but leave room for surprises. A contractor may uncover soft sheathing or damaged trim after removing old siding. A 10 to 15 percent reserve can help cover repairs without derailing the project. Small details matter. Include removal and disposal, surface preparation, and replacement of damaged materials in your budget. Also account for corner boards, window trim, house wrap, flashing, and any exterior features that need careful fitting.
Ask each contractor to quote the same work. The estimate should state the measured wall area, siding type and thickness, included accessories, labor, cleanup, and expected start and finish dates. Check whether the price covers permits or only the installation. Ask how unexpected repairs will be priced and approved; a vague “as needed” line can lead to uncomfortable disputes. Request a written payment schedule, proof of relevant insurance, and details about workmanship coverage. Then compare the scope, not just the bottom line. One quote may look cheaper because it excludes old siding removal or trim. Ask before signing. A missed line item is easy to overlook when estimates use different descriptions, and comparing them takes a little patience.
| # | Buyer Tip | What to Compare in the Quote | Budget Checkpoint |
|---|---|---|---|
| 1 | Set a complete project budget | Include siding, labor, trim, flashing, removal of existing siding, disposal, permits if required, and any needed wall repairs. | Keep a contingency for unforeseen repairs; the amount depends on the home’s condition and project scope. |
| 2 | Request multiple written quotes | Ask several qualified installers to price the same scope of work so you can compare equivalent materials, services, and exclusions. | A practical target is three itemized quotes, when available. |
| 3 | Check how measurements are calculated | Ask for the measured wall area, treatment of windows and doors, and the quantity of siding included. Confirm the stated material-waste allowance. | Waste needs vary with the home’s shape, gables, and cutting requirements; compare the assumptions rather than relying on a single standard percentage. |
| 4 | Clarify removal and wall preparation | Confirm whether old siding removal, disposal, sheathing inspection, minor repairs, and installation of a water-resistive barrier are included or priced separately. | Ask how concealed damage will be documented and approved before extra work begins. |
| 5 | Compare product specifications | Record the siding profile, color, finish, panel dimensions, and stated thickness. Common vinyl siding thickness options include approximately 0.040 to 0.050 inches. | Compare the exact specification and product documentation, not just descriptions such as “standard” or “premium.” |
| 6 | Compare trim and accessories | Check whether corner posts, starter strips, J-channel, soffit, fascia, window and door trim, and other accessories are itemized and included in the scope. | Confirm color and finish choices, and identify any upgrades that would change the quoted total. |
| 7 | Understand the installation method | Ask how the installer will address flashing, clearances, fastening, and transitions around windows, doors, rooflines, and utility penetrations. | The quote should describe the work clearly enough to show what is included and how details will be handled. |
| 8 | Read warranty terms carefully | Separate the manufacturer’s product warranty from the installer’s workmanship warranty. Review coverage, duration, transferability, and exclusions in writing. | Do not treat a warranty headline as a substitute for reading the actual terms. |
| 9 | Agree on payments and changes | Get the payment schedule, start and completion expectations, and written change-order process before work begins. | Tie payments to the contract and project milestones; avoid paying the full balance before the agreed work is complete. |
| 10 | Confirm permits, cleanup, and closeout | Ask who checks local permit requirements, arranges inspections if needed, protects landscaping, removes debris, and handles a final walkthrough. | List cleanup and closeout tasks in the written scope so expectations are clear. |
Before choosing a vinyl siding installer, ask who will supervise the work and who will actually be on site. Request proof of insurance and any licenses required in your area. Then contact two recent customers, ideally homeowners with similar houses. Ask whether the crew protected garden beds, handled unexpected rot, and returned to fix small issues. A polished estimate is reassuring, but it cannot show how a crew treats a loose corner of trim. Look for specifics.
Read the warranty documents yourself. Product coverage and labor coverage are often separate, and labor protection may be shorter. Check what maintenance is expected, how to report a defect, and whether coverage transfers to a future owner. Get the project terms in writing: siding removal, wall preparation, flashing, trim, cleanup, start dates, payment stages, and charges for extra repairs. Clarify how changes are approved before work begins. It is easy to focus on color samples and miss the terms that matter after installation. I would also ask who photographs concealed damage before covering it; that detail can prevent a disputed bill later. If an answer feels vague, pause and request clearer wording.