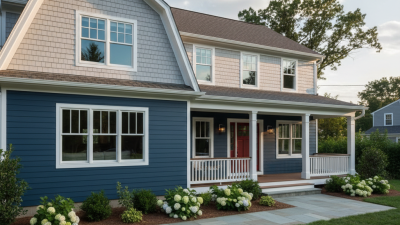

Choosing shake siding in 2026 requires more than matching a charming exterior style. The right product must suit your climate, wall assembly, budget, and maintenance expectations. A warm cedar profile may look perfect beside a stone walkway, yet it can demand regular staining in a wet region. Fiber-cement and engineered wood options may offer steadier performance, but their textures can differ noticeably at close range. Small samples rarely tell the whole story.
This guide explains how to compare shake siding with practical, project-focused judgment. You will examine material composition, panel thickness, color retention, moisture management, installation details, and long-term upkeep. We will also consider how changing weather patterns can affect expansion, drainage, and surface wear. Manufacturer documentation matters. So does advice from qualified installers who understand local construction practices and ventilation requirements.
Look closely.
A reliable selection process includes reviewing warranties, checking tested performance claims, and inspecting completed projects in similar conditions. Ask whether the product needs special fasteners, trimmed edges, or wider clearances near roofs and decks. These details can influence both appearance and labor costs. I have found that the least expensive option is not always the most economical after ten years. Still, no material is flawless. Even premium shake siding can fade, chip, or reveal installation mistakes. That uncertainty deserves honest consideration before ordering.
The goal is not to choose the trendiest finish. It is to choose a durable, compatible system that remains attractive after years of sun, rain, wind, and ordinary maintenance.
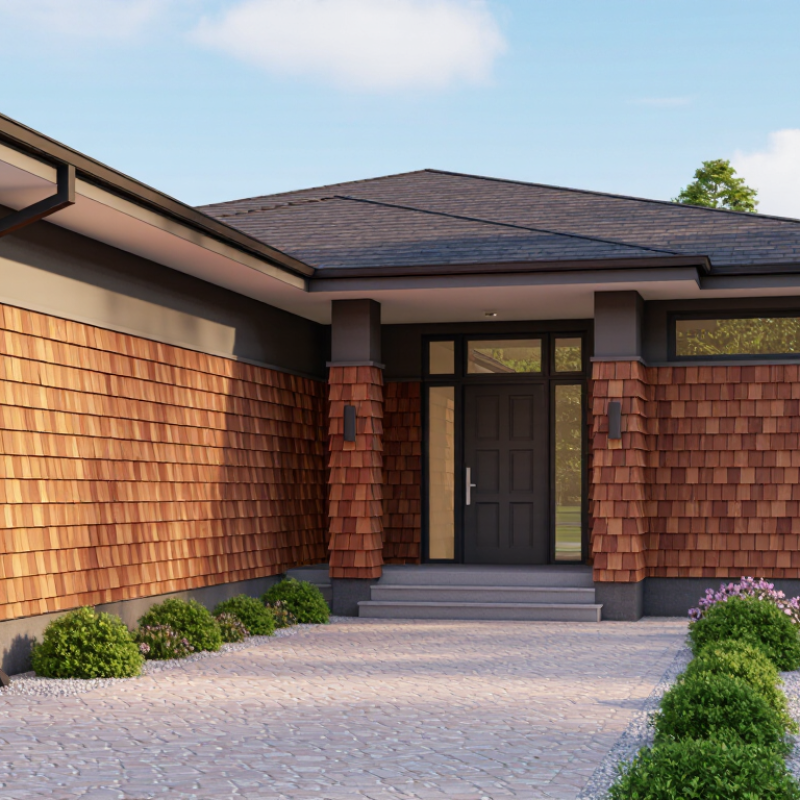
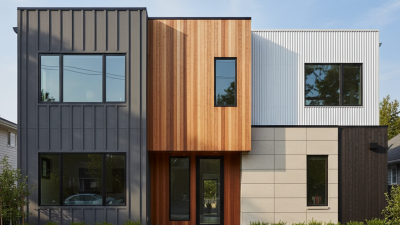
Choose shake siding by matching appearance with local exposure, not by color alone. Start with your project’s architectural language: coastal cottages suit irregular, weathered textures, while modern homes benefit from consistent courses and restrained contrast.
Place sample panels beside the roof, windows, and paving. Small details matter. A gray sample can appear blue under northern light and beige beside warm brick.
NOAA’s 1991–2020 Climate Normals provide local temperature and precipitation data for evaluating seasonal exposure. NOAA also recorded 27 U.S. billion-dollar weather and climate disasters in 2024, reinforcing the need for resilient exterior planning.
In wet regions, prioritize drainage, flashing, and drying behind the shakes. The U.S. Department of Energy’s Building America guidance identifies these controls as essential to durable wall systems. In windy areas, confirm fastening schedules and corner detailing with local code requirements.
Review tested product documentation, not just marketing language. ASTM and code references can clarify how materials were evaluated, but test results do not guarantee identical field performance. Installation quality remains decisive.
A beautiful panel can fail above a poorly flashed window. I would also question overly perfect mockups; real walls collect dust, shadow, and uneven weathering.
Build a small test section first. Reconsider after one hard rain.
Shake siding choices differ sharply in material, texture, maintenance, and installation. Cedar offers natural grain and aging character, but it needs careful sealing and ventilation. Fiber-cement shakes resist insects, fire, and moisture better, although they weigh more and require dust-controlled cutting. Engineered polymer shakes are lighter and consistent, yet their molded texture can look repetitive at close range. Texture matters. Compare staggered edges, grain depth, shadow lines, and color variation under daylight.
Installation method affects performance as much as appearance. Cedar usually needs a rainscreen gap, corrosion-resistant fasteners, and precise flashing around windows. Fiber-cement requires approved blades, proper joint spacing, and support at wall openings. Polymer panels often install faster, but installers must allow movement around corners and penetrations. The 2023 International Energy Conservation Code emphasizes continuous air control and moisture management, so attractive siding cannot compensate for poor wall detailing.
Cost data also deserves caution. The 2024 Cost vs. Value Report estimated fiber-cement siding replacement at about 88% cost recovery nationally. Local labor, climate, and workmanship can change that result significantly. The U.S. Department of Energy notes that siding alone provides limited insulation value; insulation and air sealing remain more influential. I would not choose a texture from a small sample. Full-size panels reveal repetition, glare, and uneven shadowing. A rushed installation can ruin expensive material. That is the uncomfortable part.
Durability starts with the siding material, not its appearance. Natural wood shakes can last for decades with proper detailing and regular care. Composite and fiber-cement shakes usually resist insects, rot, and moisture better. Check the product’s impact, fire, and wind ratings before choosing. Local building requirements still matter.
Weather exposure changes everything. On a coastal home, salt air and driving rain can stress unsealed wood. In cold regions, repeated freezing and thawing may open small gaps. Wide roof overhangs, flashing, and a ventilated wall assembly help limit water intrusion. I have seen attractive siding fail because installers ignored drainage behind the surface.
Maintenance needs an honest assessment. Wood may require staining or sealing every few years, depending on sunlight and rainfall. Look for curling edges, soft spots, mildew, and fading during seasonal inspections. Clean gently with a soft brush; aggressive washing can damage the finish. My early assumption was that thicker shakes always offered better protection. That was too simple. Poor installation can defeat excellent materials. Ask for installation records, warranty limits, and climate-specific performance data. Request a sample, then expose it to your actual conditions when possible. Small details reveal more than showroom lighting.
How to Choose Shake Siding for Your Project in 2026
Calculate the wall area before comparing shake siding prices. Measure each wall, subtract large windows and doors, then add 10% for cutting waste. Your real budget also includes trim, flashing, fasteners, removal, labor, permits, and disposal. A low material price can become expensive after installation. Request itemized quotes from at least three qualified contractors. Start with measurements.
Material choice strongly affects lifespan. Cedar may last 20 to 30 years with regular staining and careful moisture control. Fiber cement or engineered products can often perform for 30 to 50 years when installed correctly. Actual results depend on sunlight, rainfall, ventilation, and the wall behind the siding. Check the written warranty, maintenance schedule, and local code requirements. Ask who handles repairs if moisture appears around windows.
Long-term value is more than the initial invoice. Estimate annual cleaning, sealing, painting, and possible replacement of damaged shakes. For example, a $18,000 installation lasting 30 years costs about $600 per year before maintenance. A $24,000 system lasting 45 years may offer better value, even with a higher starting price. My first estimates often ignored scaffolding and corner details. That mistake changed the final cost. Leave room for uncertainty, especially with older walls or hidden water damage. A small sample on your actual exterior can reveal color changes and texture issues that photographs cannot.
Estimated installed cost, expected service life, and 30-year ownership value for common shake siding options.
Estimates are shown per 100 square feet of siding. Installed costs reflect typical U.S. planning ranges for materials and labor in 2026. The 30-year ownership estimate includes the initial installation plus routine maintenance and likely replacement costs during the period. Actual prices vary by region, building access, detailing, and finish requirements.
Choosing shake siding in 2026 requires more than comparing textures and colors. Start by checking your local building department’s current requirements. Rules may address siding thickness, flame spread, wind resistance, water drainage, and fastening methods. Coastal areas may require stronger attachment systems. Historic districts can also restrict visible materials or exterior changes. Do not rely on an old contractor estimate. Requirements can change.
Tips: Request written guidance from your building office. Ask whether a permit, inspection, or neighborhood approval is required. Bring a product sample, wall photo, and installation details to the meeting. Confirm clearance around windows, doors, roofs, and electrical equipment. Small gaps can create large moisture problems.
Select siding that suits your climate and wall assembly. Natural shakes offer variation, but they need careful sealing and ventilation. Engineered options may reduce maintenance, though their approved uses still matter. Review the manufacturer’s installation instructions without skipping the less attractive details. Check drainage planes, flashing, corner treatment, and fastener spacing. A local installer should explain how the system handles heavy rain, heat, and seasonal movement. One mistake is choosing the best-looking profile before checking code limits. I have seen attractive plans become expensive revisions after approval was overlooked. Keep permit records, product documents, and inspection notes together. Ask questions early. It saves rework.